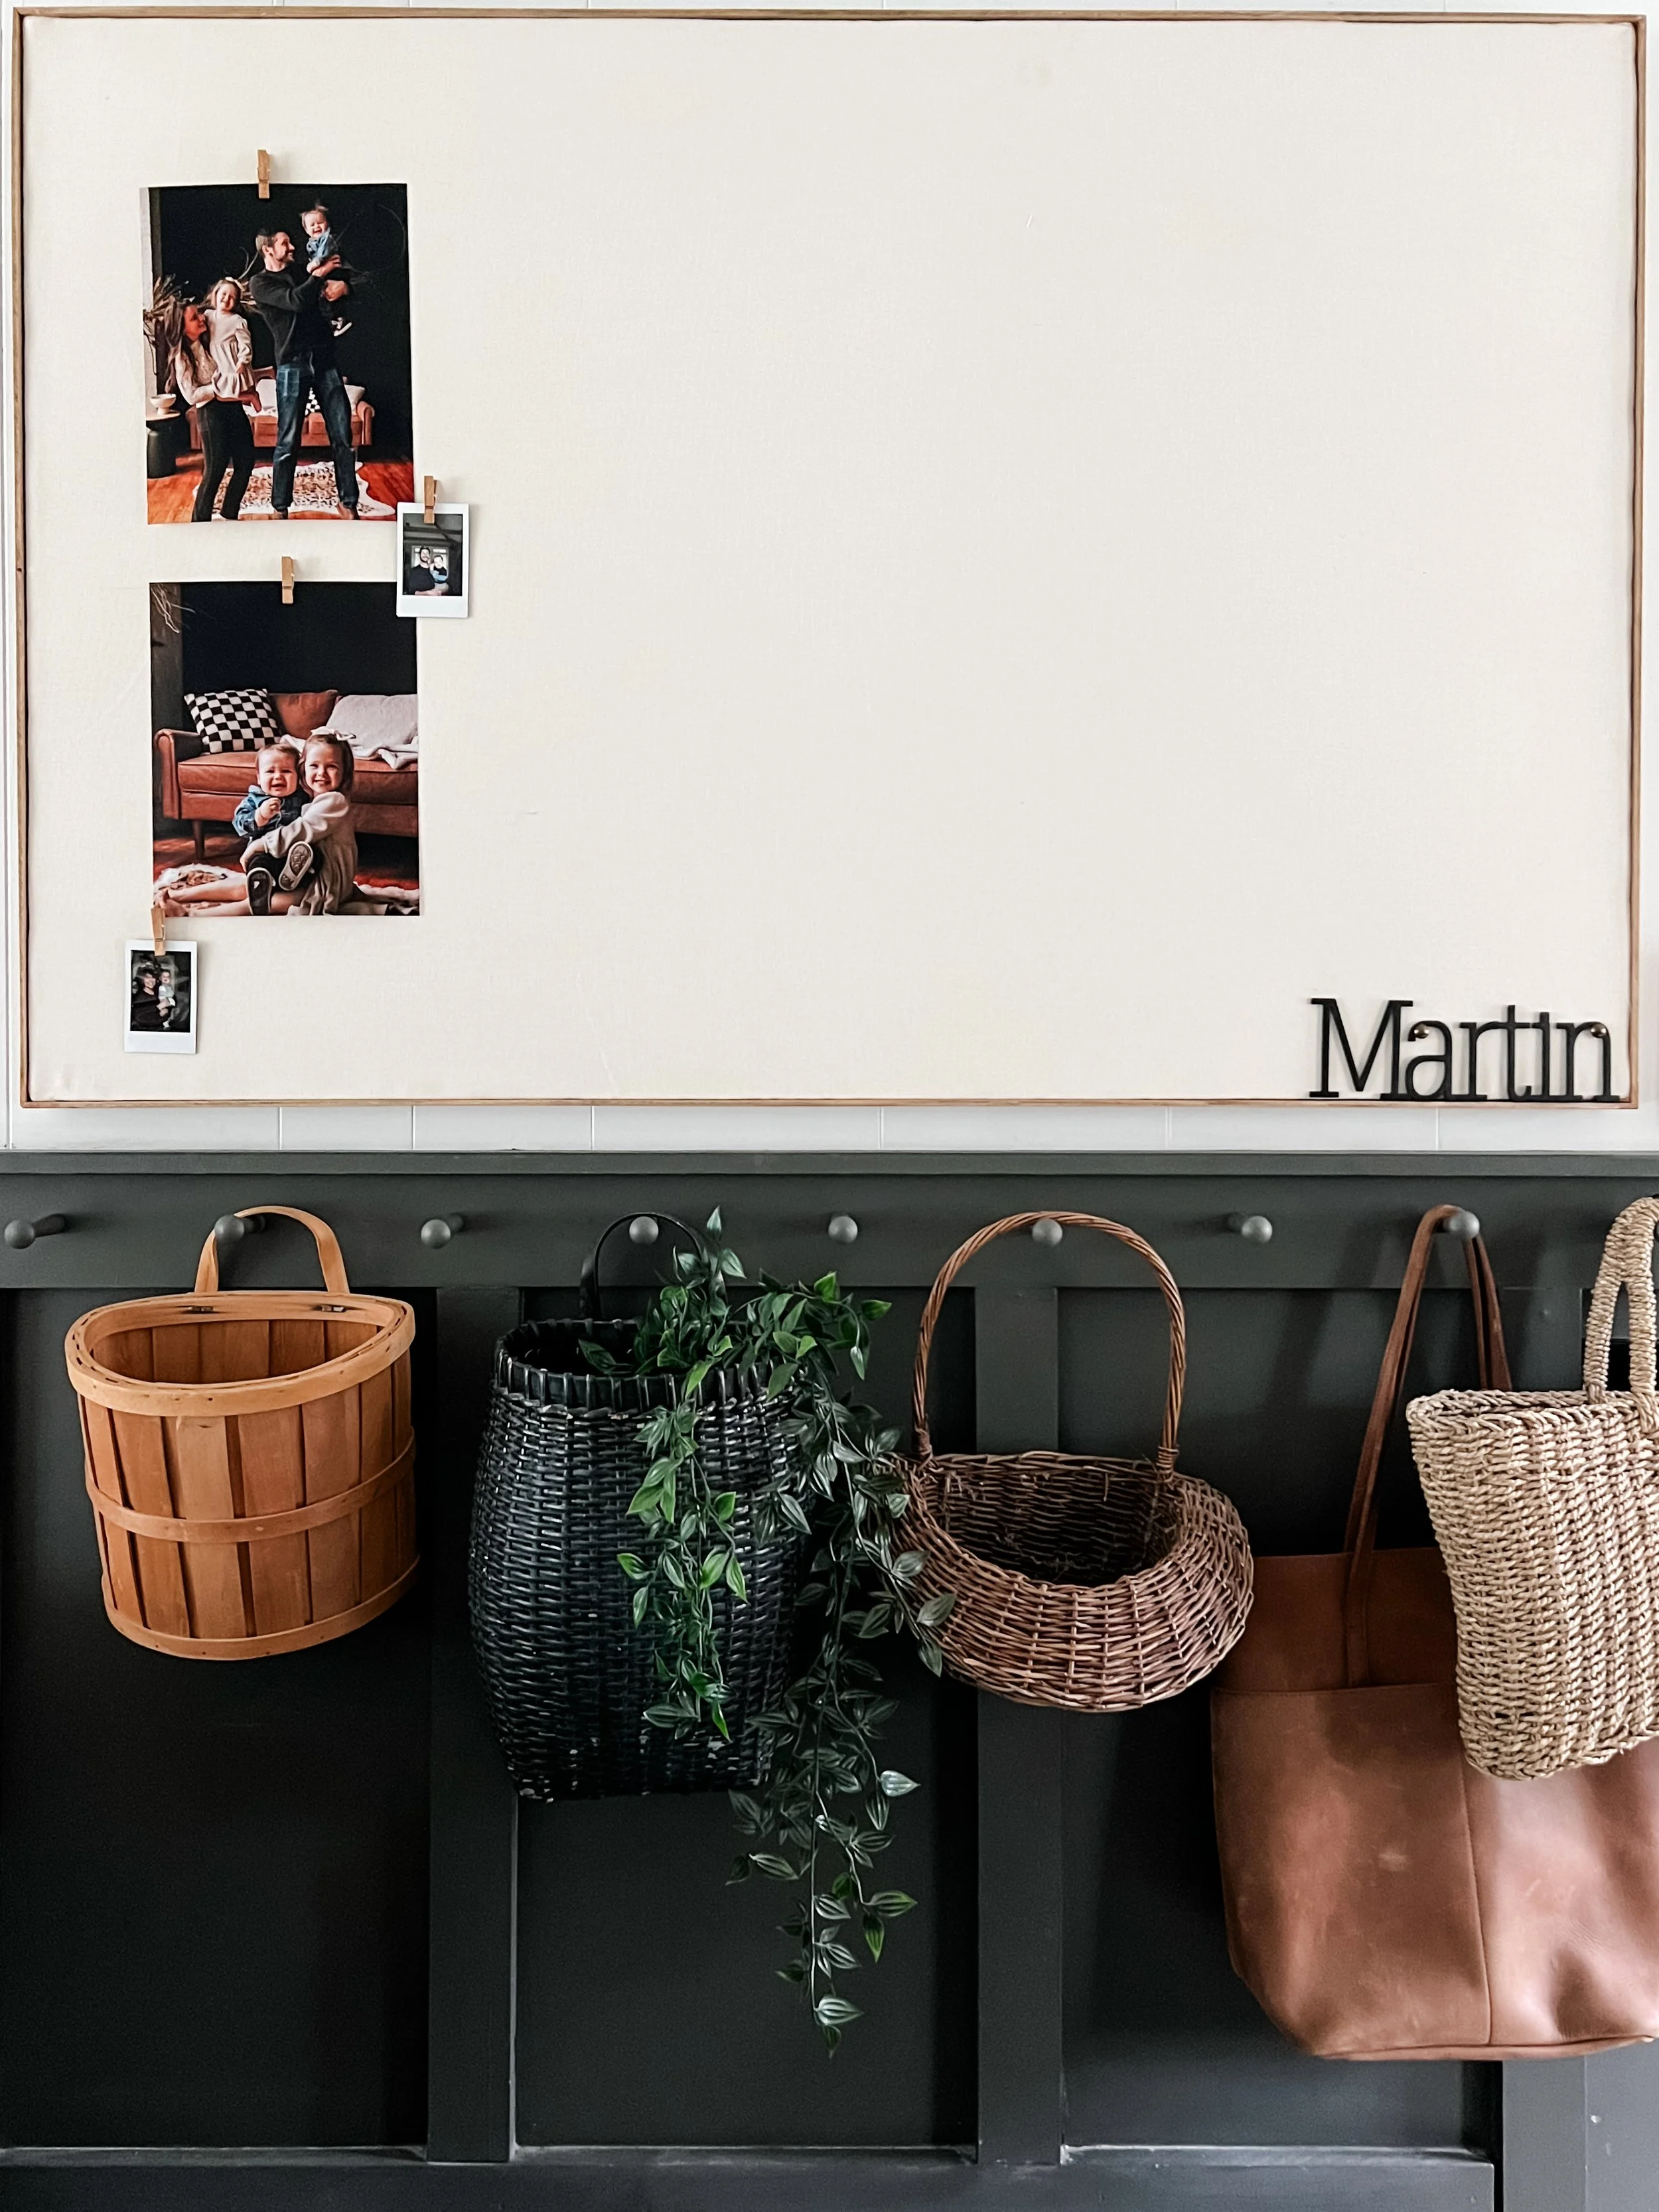
DIY Pinboard: Material List, How-To, & All The Extras

My sister got a polaroid camera for Christmas several years ago and I instantly (and jealously) fell in love with it. I frequently asked her to bring it over for special occasions so, she gifted us one a few years ago. I know polaroid cameras can be a bit pricey but I absolutely love ours and think they’re totally worth it. I also love how you don’t have to catch everything on polaroid because they make a polaroid picture printer that’s compatible with smartphones.
For the past few years, I have been capturing our birthdays, major holidays, and other annual celebrations with our polaroid camera. It’s fun to look back and see how much has changed through the lens of a small little image.

I’ve been trying to figure out the best way to display all the little photos for a little while now. I love some of the pinboard options found online but I couldn’t justify the price. Some companies make just 3 foot boards for over $200. That’s a no for me. Rather than buying one, I decided to make one (or four - woops!).
Here is how you can make 8+ feet of pinboard for under $100 with just 4 required materials

Material list
Hardboard panel OR 1/8 in plywood
Fabric of your choosing
Electric stapler with staples
Finishing grommets (optional)
DIY frame (optional)
Photos and decorations of your choosing!
Step 1: Assemble the board

We picked up an 8 foot foam insulation board board and hardboard panel hard board from Home Depot. We had Home Depot cut the hardboard panel into thirds so we had three two-and-a-half foot sections that were still four feet high.
I laid the hardboard (already cut to size) on top of the full eight foot foam insulation board. I then cut the insulation board to the size of the hardboard with a simple box cutter. The insulation board cuts and brakes sooo easy. No power tools required!
I then added a bit of wood glue (you could totally use hot glue, too. I just didn’t have any) and weighed it down with paint cans and weights to dry. Nothing fancy over here!
Step 2: Add the fabric
I got some door buster, on clearance fabric from JOANNs. It is thick and only cost me $4.99 a yard. I was a bit worried about the insulation board showing through the fabric so I ended up getting extra and double layered it.
I spent some extra time ironing the fabric so it was super smooth. Adding it to the insulation board was very easy. I simply placed the insulation board on top of the fabric (with the hardboard backer already glued and attached) and cut it to size.
I bought 1 in insulation board so I left at least 2 inches of fabric on each side. This gave me enough fabric to cover the sizes with some extra to staple.

I use THESE fabric scissors to do cut all my fabric. They’ve done all my jeans, sweatshirts, bench cushions - you name it! They work incredibly well and really do make all the difference.
Step 3: Staple
Next step is to (literally!) pull everything together. Work your way around the hardboard backer while pulling the fabric as tight as you can to staple everything together.

I got sick of using a hand stapler after tearing up my hands on a bench cushion I made a while ago. I like THIS electric stapler. It is plug-in so it does most of the work for you. This makes stapling a breeze. It is also compatible with a lot of different staple sizes. I used 10mm staples on this project to ensure each went through the fabric and the hardboard equally.
Step 4: Hang & Decorate


Disclaimer: as an Amazon associate, I may make a small percentage from qualifying purchases.
as always — remember to head over to Instagram where you can find other ideas to turn the house you can afford into the home of your dreams.